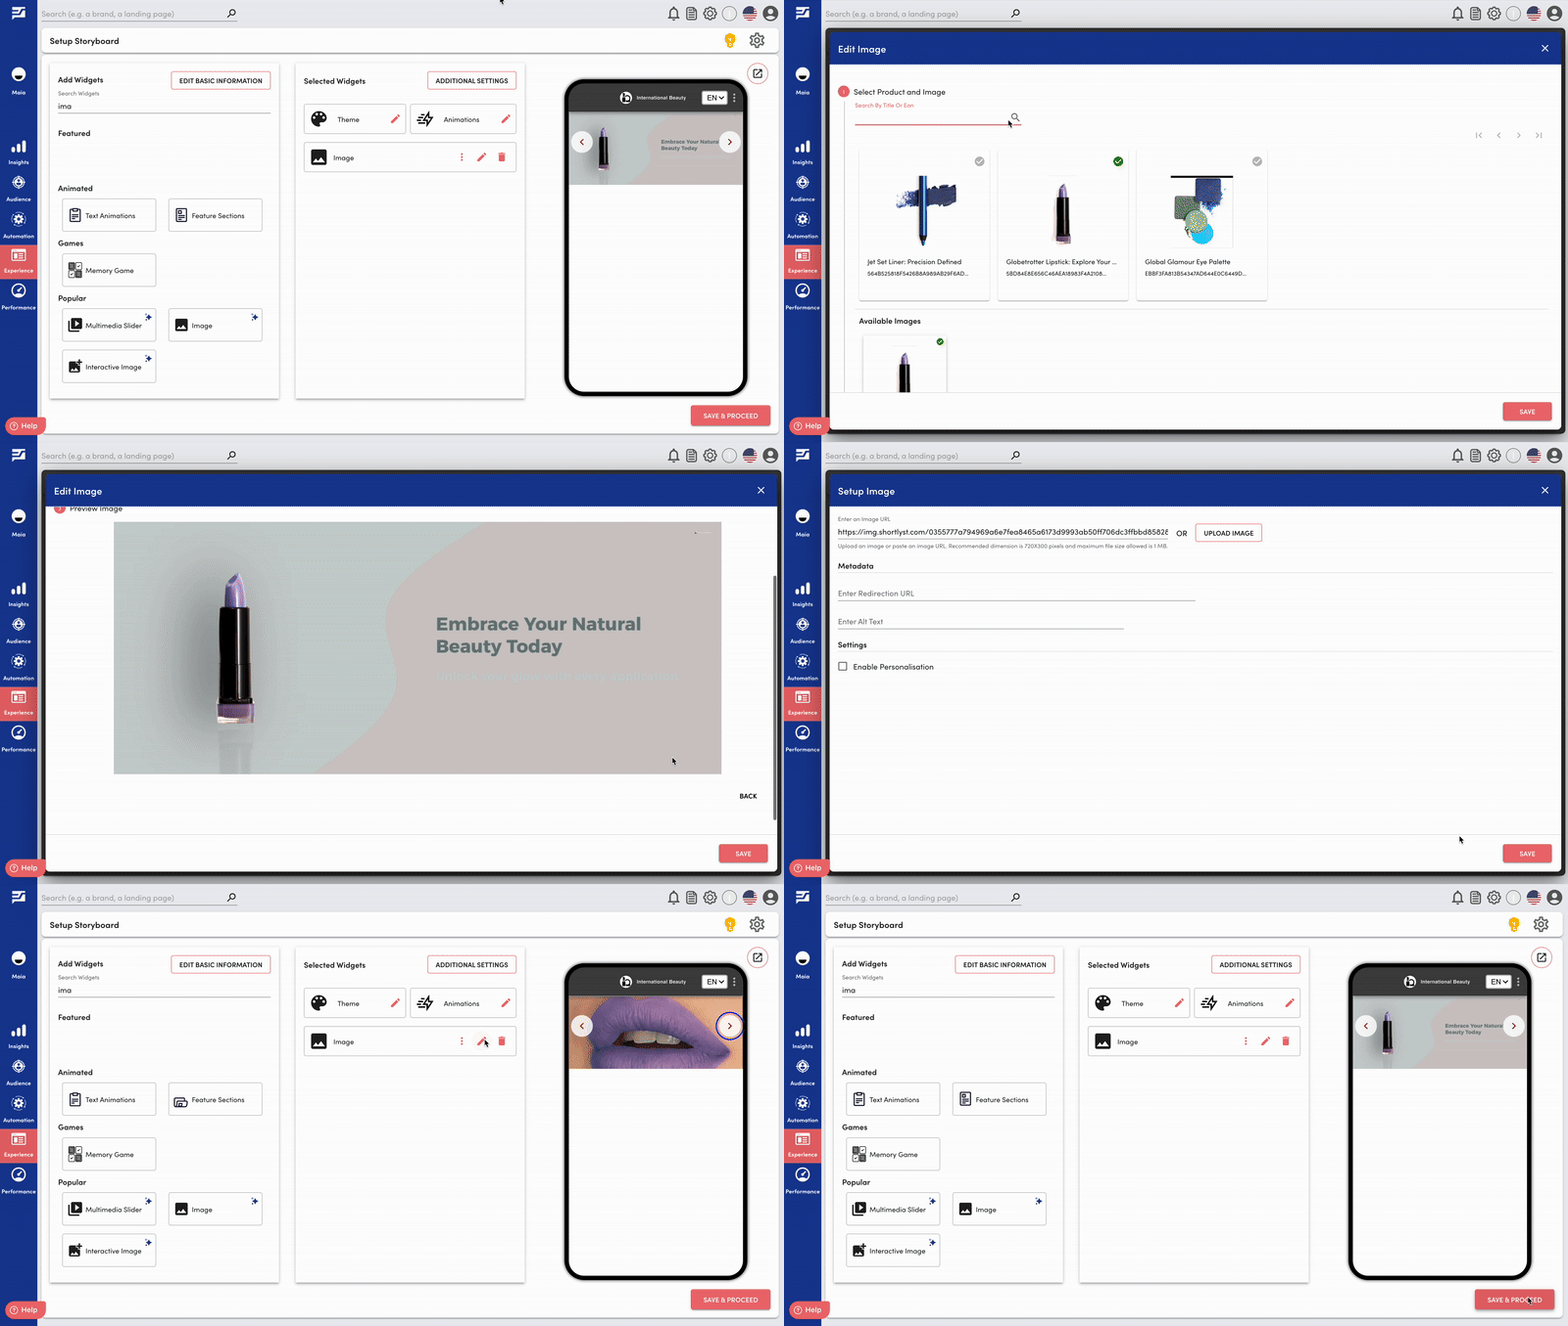
Use this widget to add images to your landing page, specifications for the images are available in this article The Images widget allows you to easily upload or link images to your landing page. The Create New Image feature in the Image & Multimedia Widget helps you design custom banner visuals directly within the Shopbuilder platform. This capability makes it easy to create fresh, ready-to-use banners without relying on external design tools.
You can generate 720×300 px banner images (recommended banner size) through a guided and easy-to-use interface. It blends automation with creative control letting you design visually consistent, brand-ready images in just a few steps.
Follow the Steps to create new Images in your campaign:
Select Product and Image – Choose a product from your catalog and its associated image.
Auto-Generate Text – The system automatically creates a tagline, subtext, and disclaimer to match your selected product.
Customize Design – Adjust background and text colors using the built-in style controls to align with your campaign theme.

You can also add the Images, manually as shown in the following video:

Follow the Steps to use Images in your campaign:
Step 1: Select Add Image and Enter Segment Title
Step 2: Now select Setup new image post which a dialogue box to setup image will appear
Step 3: Update the following fields
Enter an image URL or you can upload an image from the system using the Upload Image option
You can also personalize the updated image by one of the three options by enabling Personalised Image
Step 4: Repeat the above steps to add more images to your campaign
Looking for more help? Instructions to reach out to the support team are here.

